Aquatic Invasive Species (AIS) Disposal Station Instructions
Aquatic Invasive Species (AIS) Disposal Station Instructions
AIS Disposal Station Instructions 3.17.20 (pdf)
In order to provide an easy place for boaters to dispose of invasive species at a boat launch, and to spread knowledge about the Clean, Drain, Dry message at boat launches, a number of access sites have AIS Disposal Stations installed on their premises. These stations offer a clearly defined, easily accessible location for disposal of AIS found on watercraft, and a great location for signage related to AIS.
The NYSDEC offers a number of resources and plans for the construction of AIS Disposal Stations: https://www.dec.ny.gov/animals/50626.html. However, the DEC plans pose various construction barriers for groups with limited physical or monetary resources. The following plans offer a simple, safe, and effective alternative to those plans. The Finger Lakes Institute (FLI) plans for an AIS Disposal Station only require two people at most and should only take a few hours. All materials can be purchased at a local or big-box hardware store.
Supplies per station:
- 1 x 6” cedar boards (as thick as you can find up to 5/4” width; trim stock works well) – 9 x 8’ boards
- 4 x 4” posts (cedar if you can find it; or anything rot resistant) – 2 x 8’ boards
- (#8) – 2 ½” deck screws – 5 lb. box
- 2” x 4” fencing – ~4’ x 4’
- garden fabric – ~4’ x 8’
- 5 ft3 all-purpose gravel
Tools:
- Power drill and drill bits
- Power driver and bits
- Circular or miter saw
- Wire nippers
- Stapler and staples
Building Instructions:
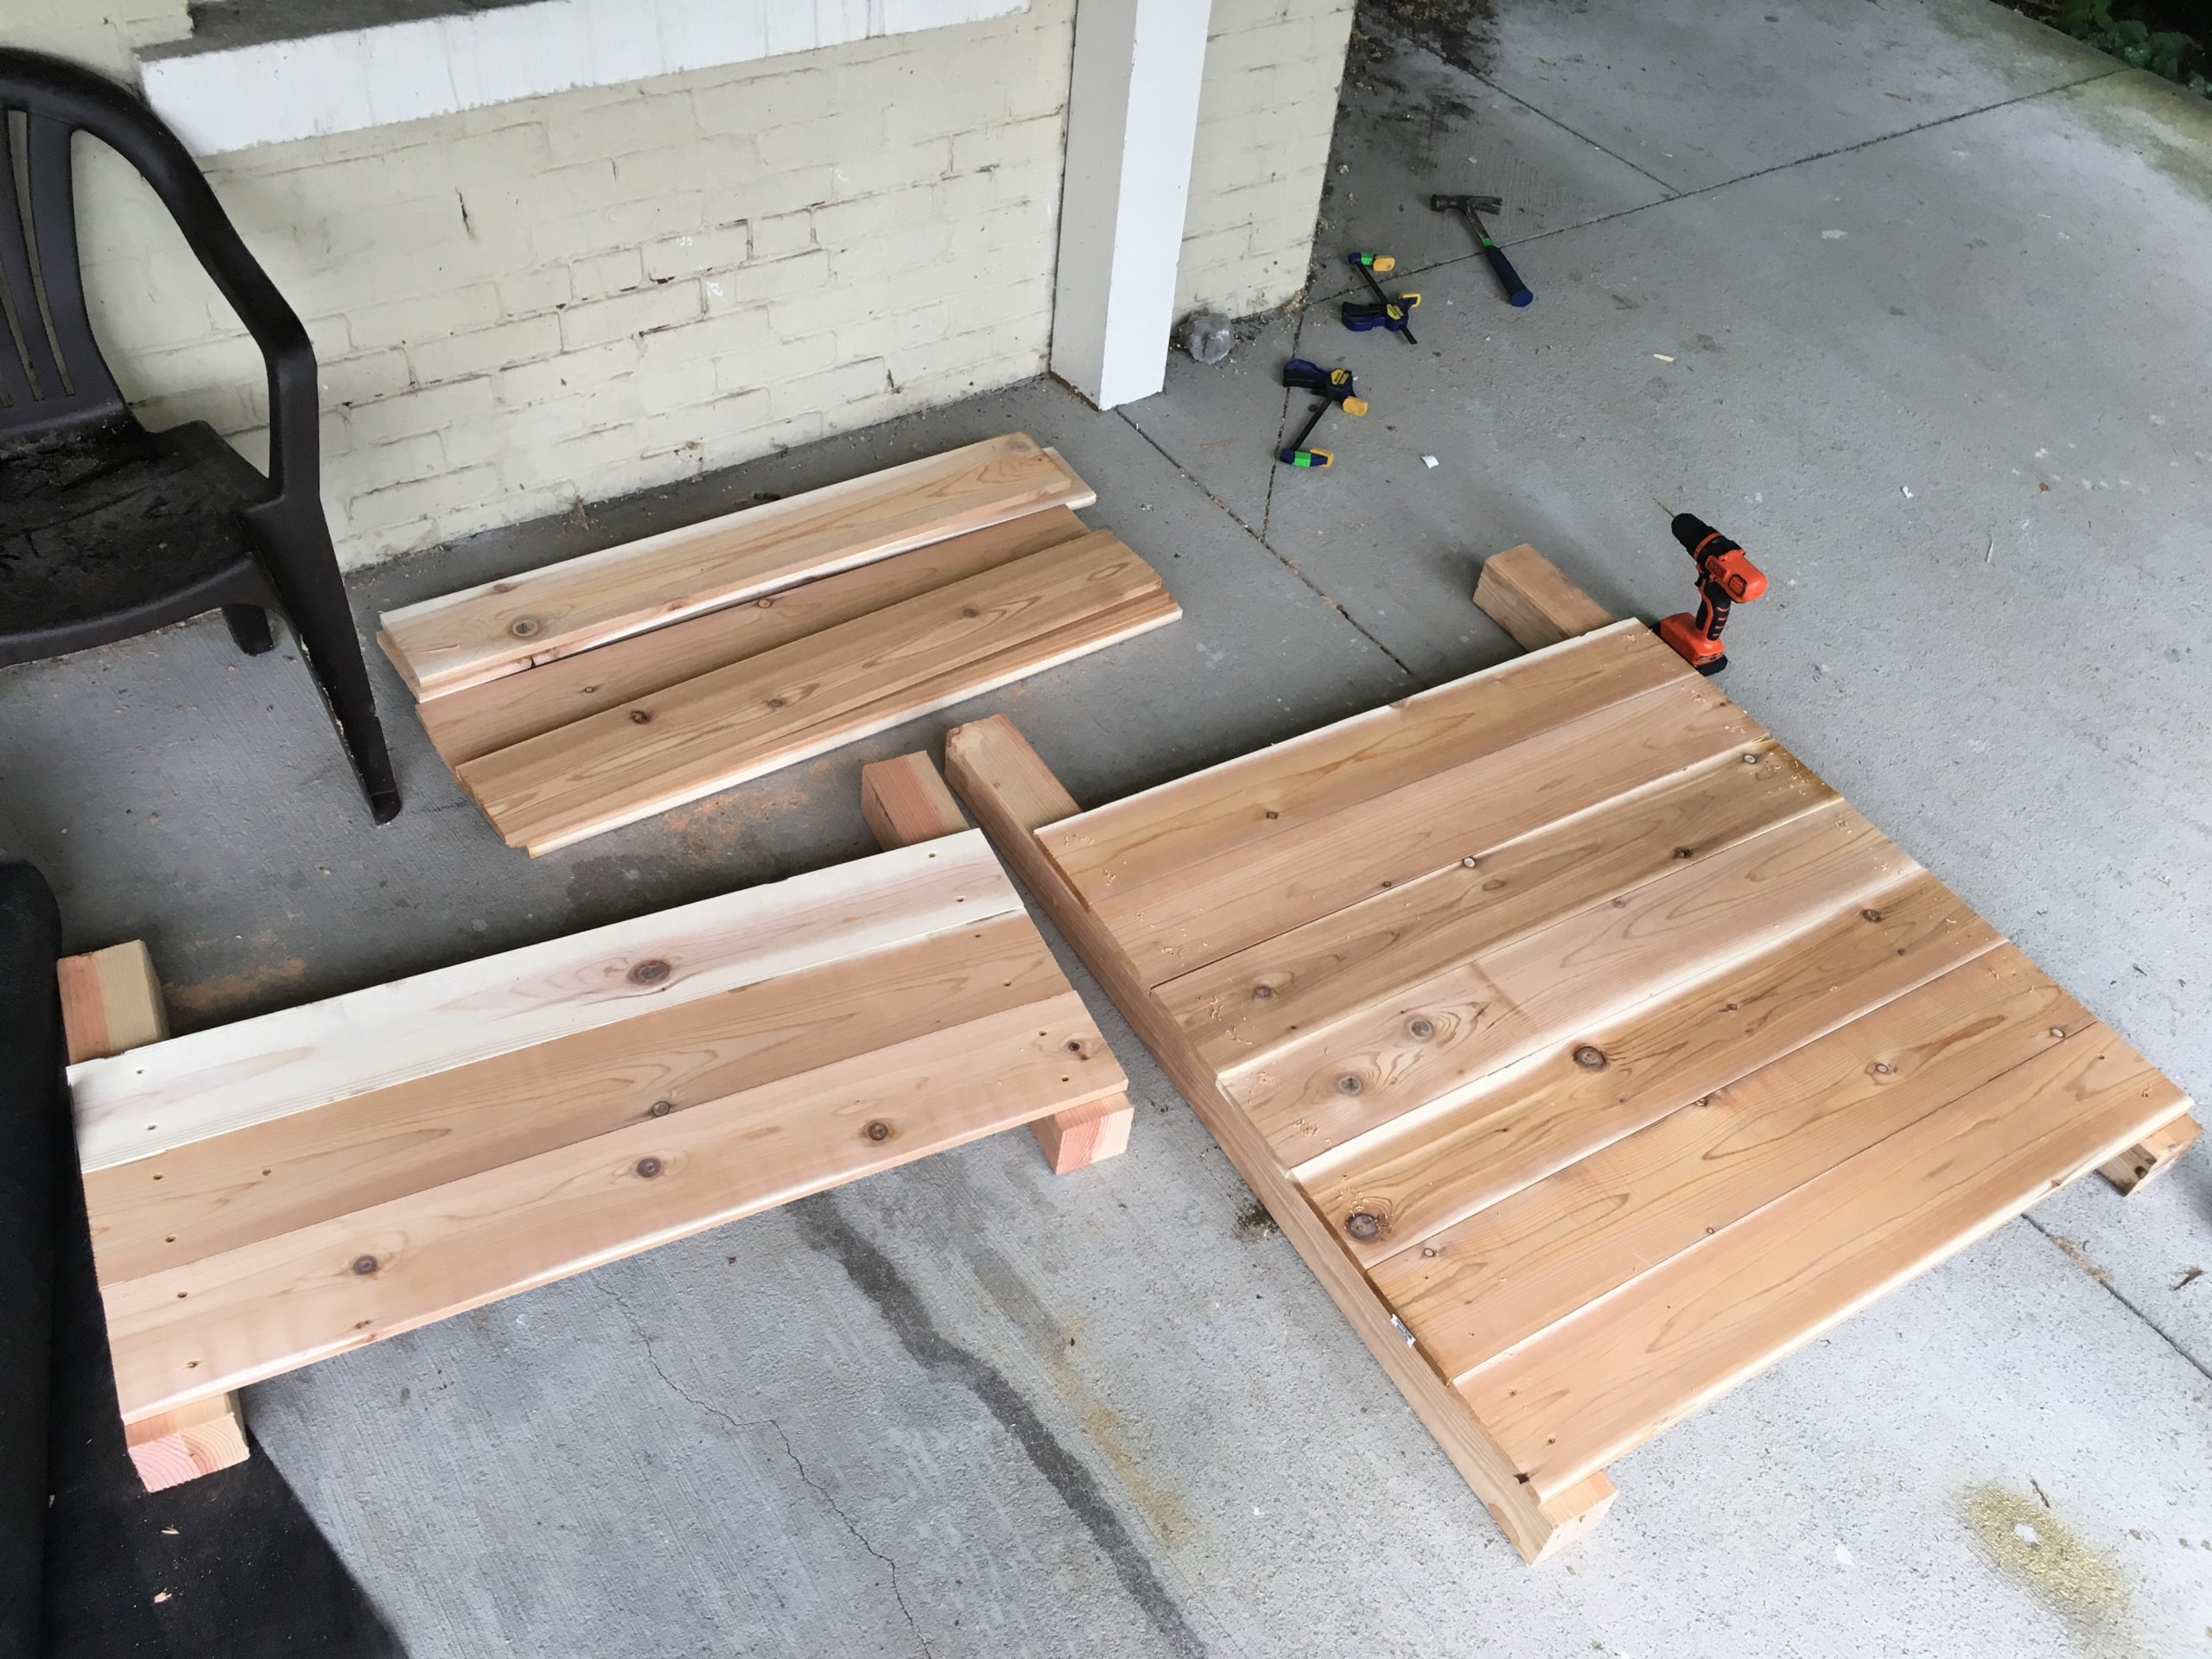
- Cut boards and posts
- Cut posts to size – 2 posts at 24 inches, 2 posts at 48 inches
- Cut cedar boards to a standard size, (we recommend between 35 and 40 inches)– at most 40 inches for each stringer – cut smaller stringers for station with a smaller footprint
- Build Panels (Photo 1)
- Arrange stringers perpendicular to posts, and flush on each side so that both ends of each stringer are flush with opposing posts
- Pre-drill ends of panel stringers to make room for 3 screws
- Using deck screws, attach panel stringers to matching posts to make a front panel out of the 24 inch posts, and a back panel out of the 48 inch post (3 stringers for front panel, 8 stringers for back panel)
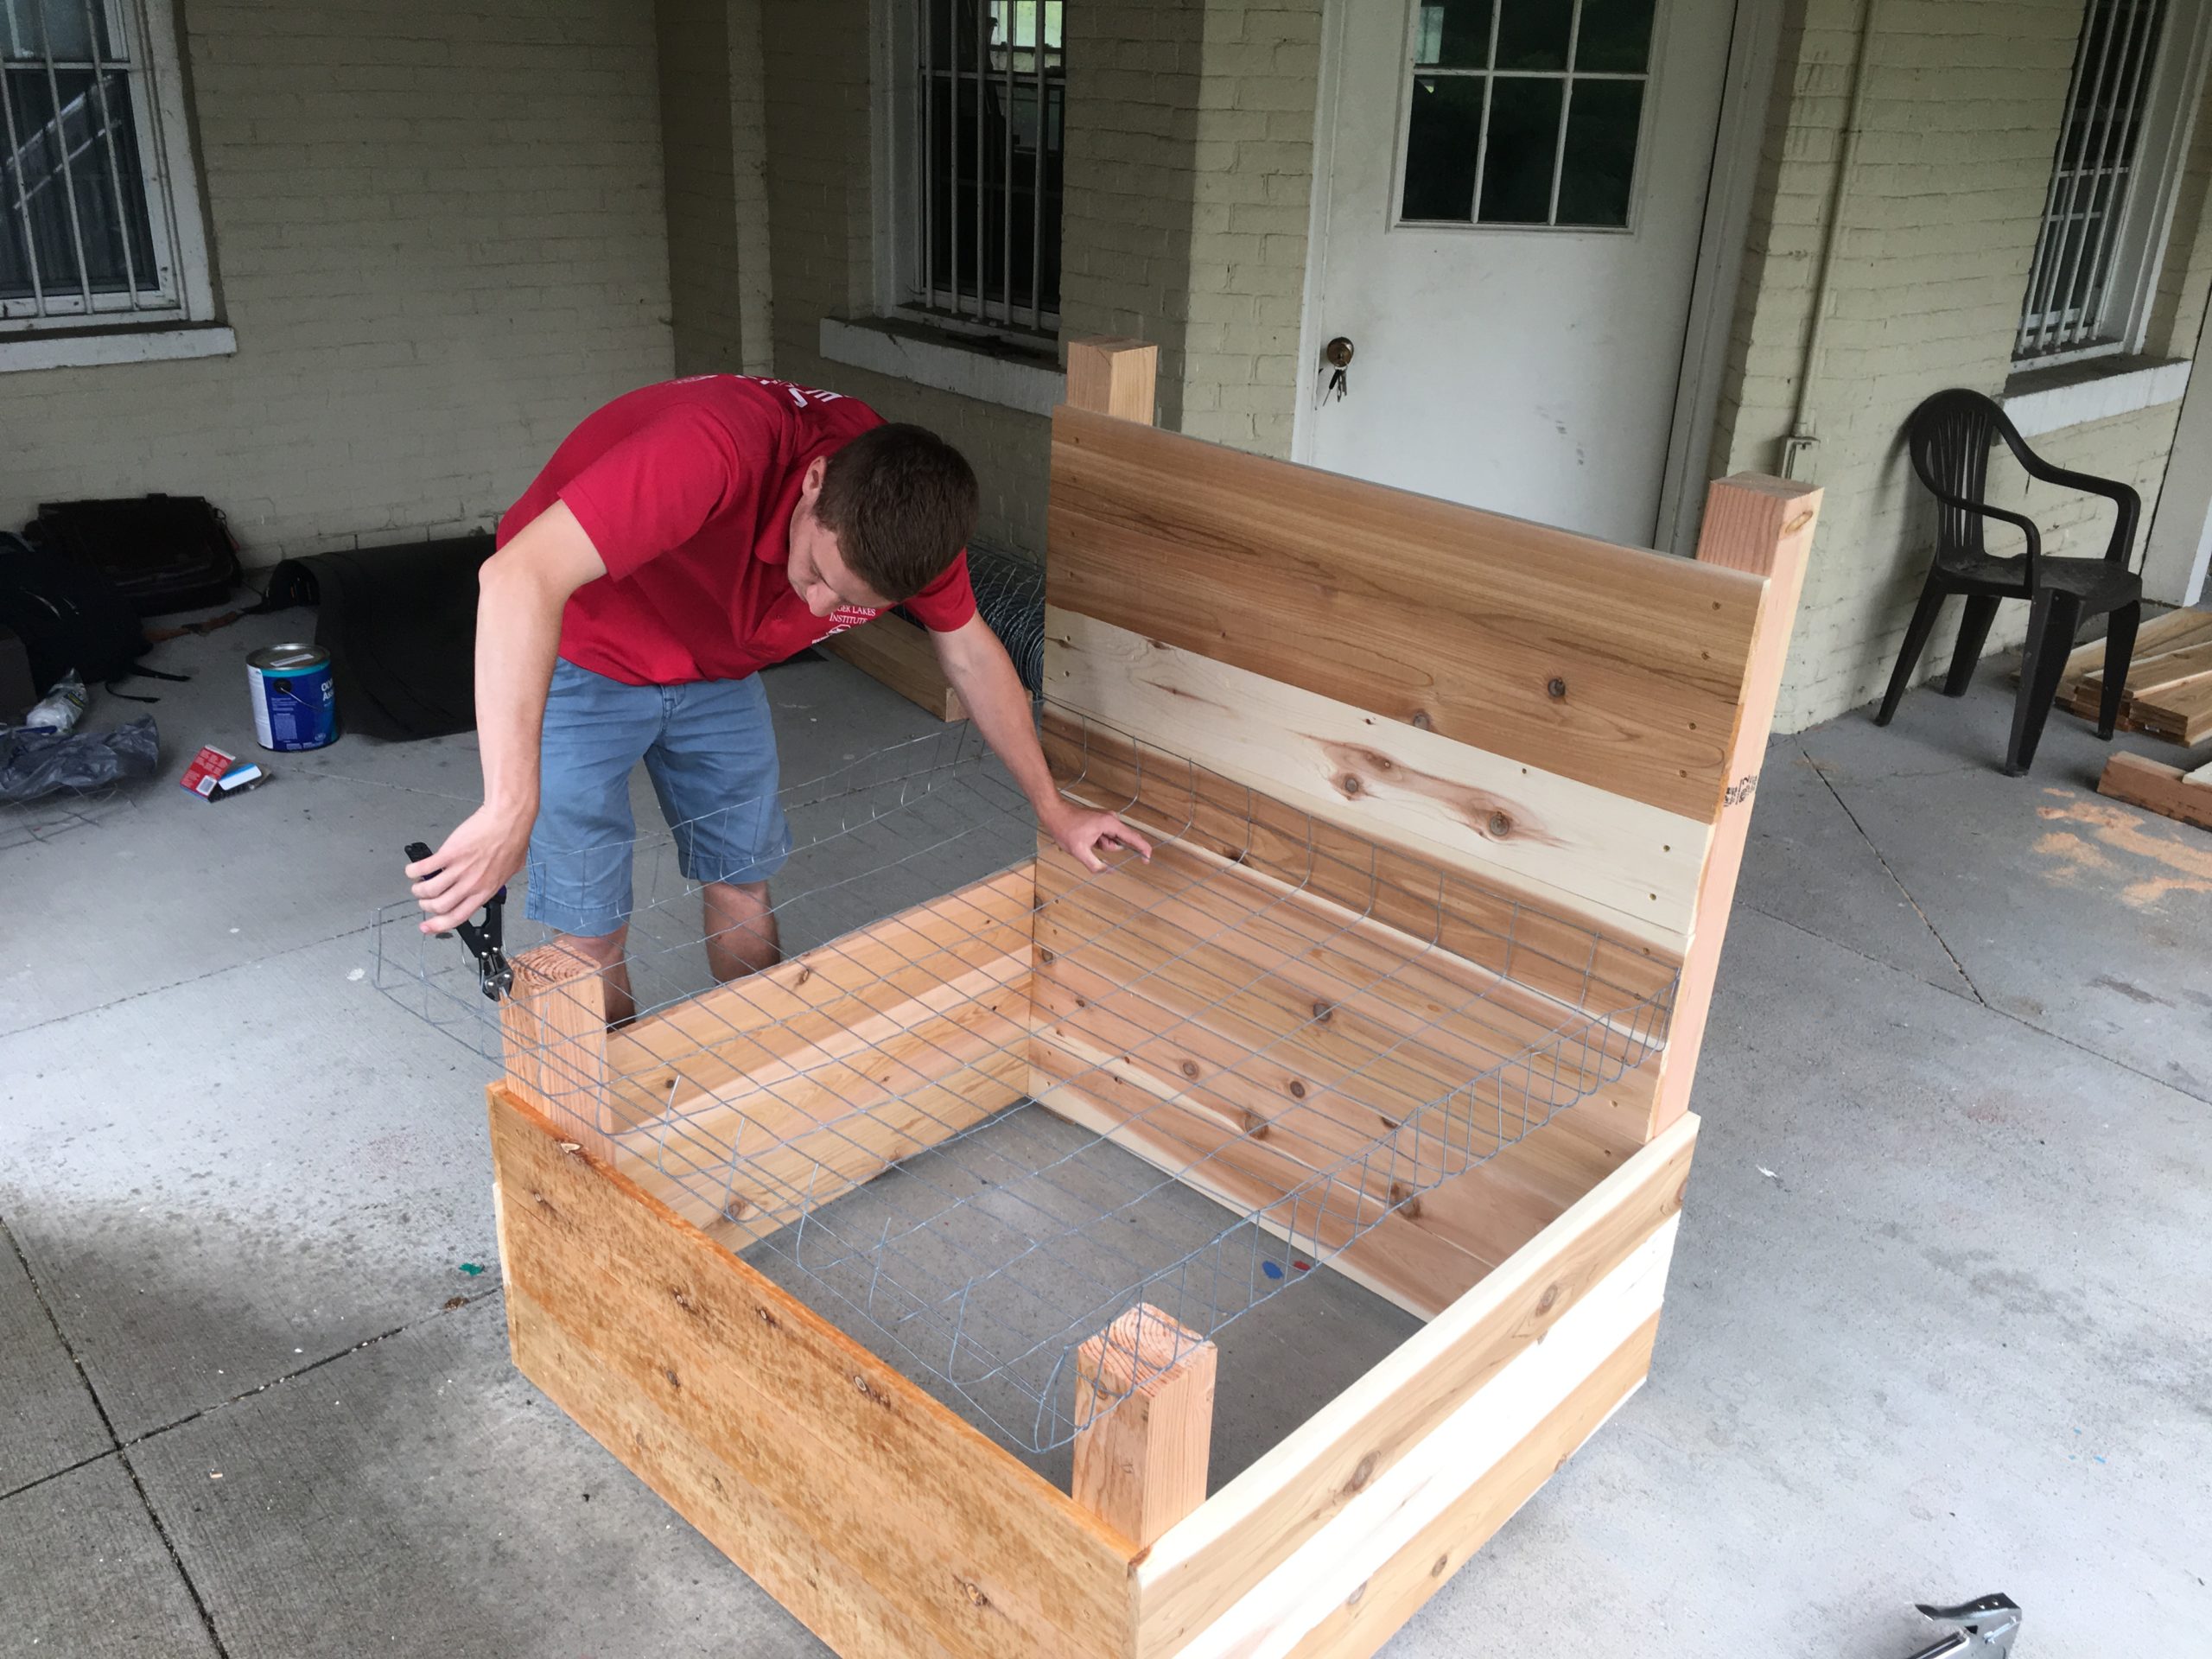
- Assemble box (Assembled box in Photo 2)
- Pre-drill ends of new stringers to make room for 3screws
- Attach side stringers to posts of the front (24”) and back (48”) panels, with the cedar-faced side of each panel facing in the same direction
- Ends of side stringers should butt up flush to ends of panel stringers
- Use the same number of side stringers as the number of front panel stringers
- Side stringers should be positioned to match height of front panel stringers
- Repeat on the opposite side
- Fencing (Photo 2)
- Cut fencing to size, removing material from corners for the posts, this will create flaps in the fencing
- Bend up flaps to 90 degrees to create a shallow box of fencing to place inside disposal box
- Bottom of fence “box” should be level with bottom of wooden box
- Staple flaps to inside of stringers on all sides, and to posts where possible – use as many staples as necessary to hold considerable weight – a staple in each fence cell is ideal
- Matting (Photo 3)
- Matting separates contents of the box from the environment and vice versa
- Cut matting to size (8’ x 4’) to fit inside the box with two layers, leaving space in corners for the posts as in Fencing Step 1 – leaving these spaces will provide the matting with flaps as well
- Install matting over wire fence, and staple into place
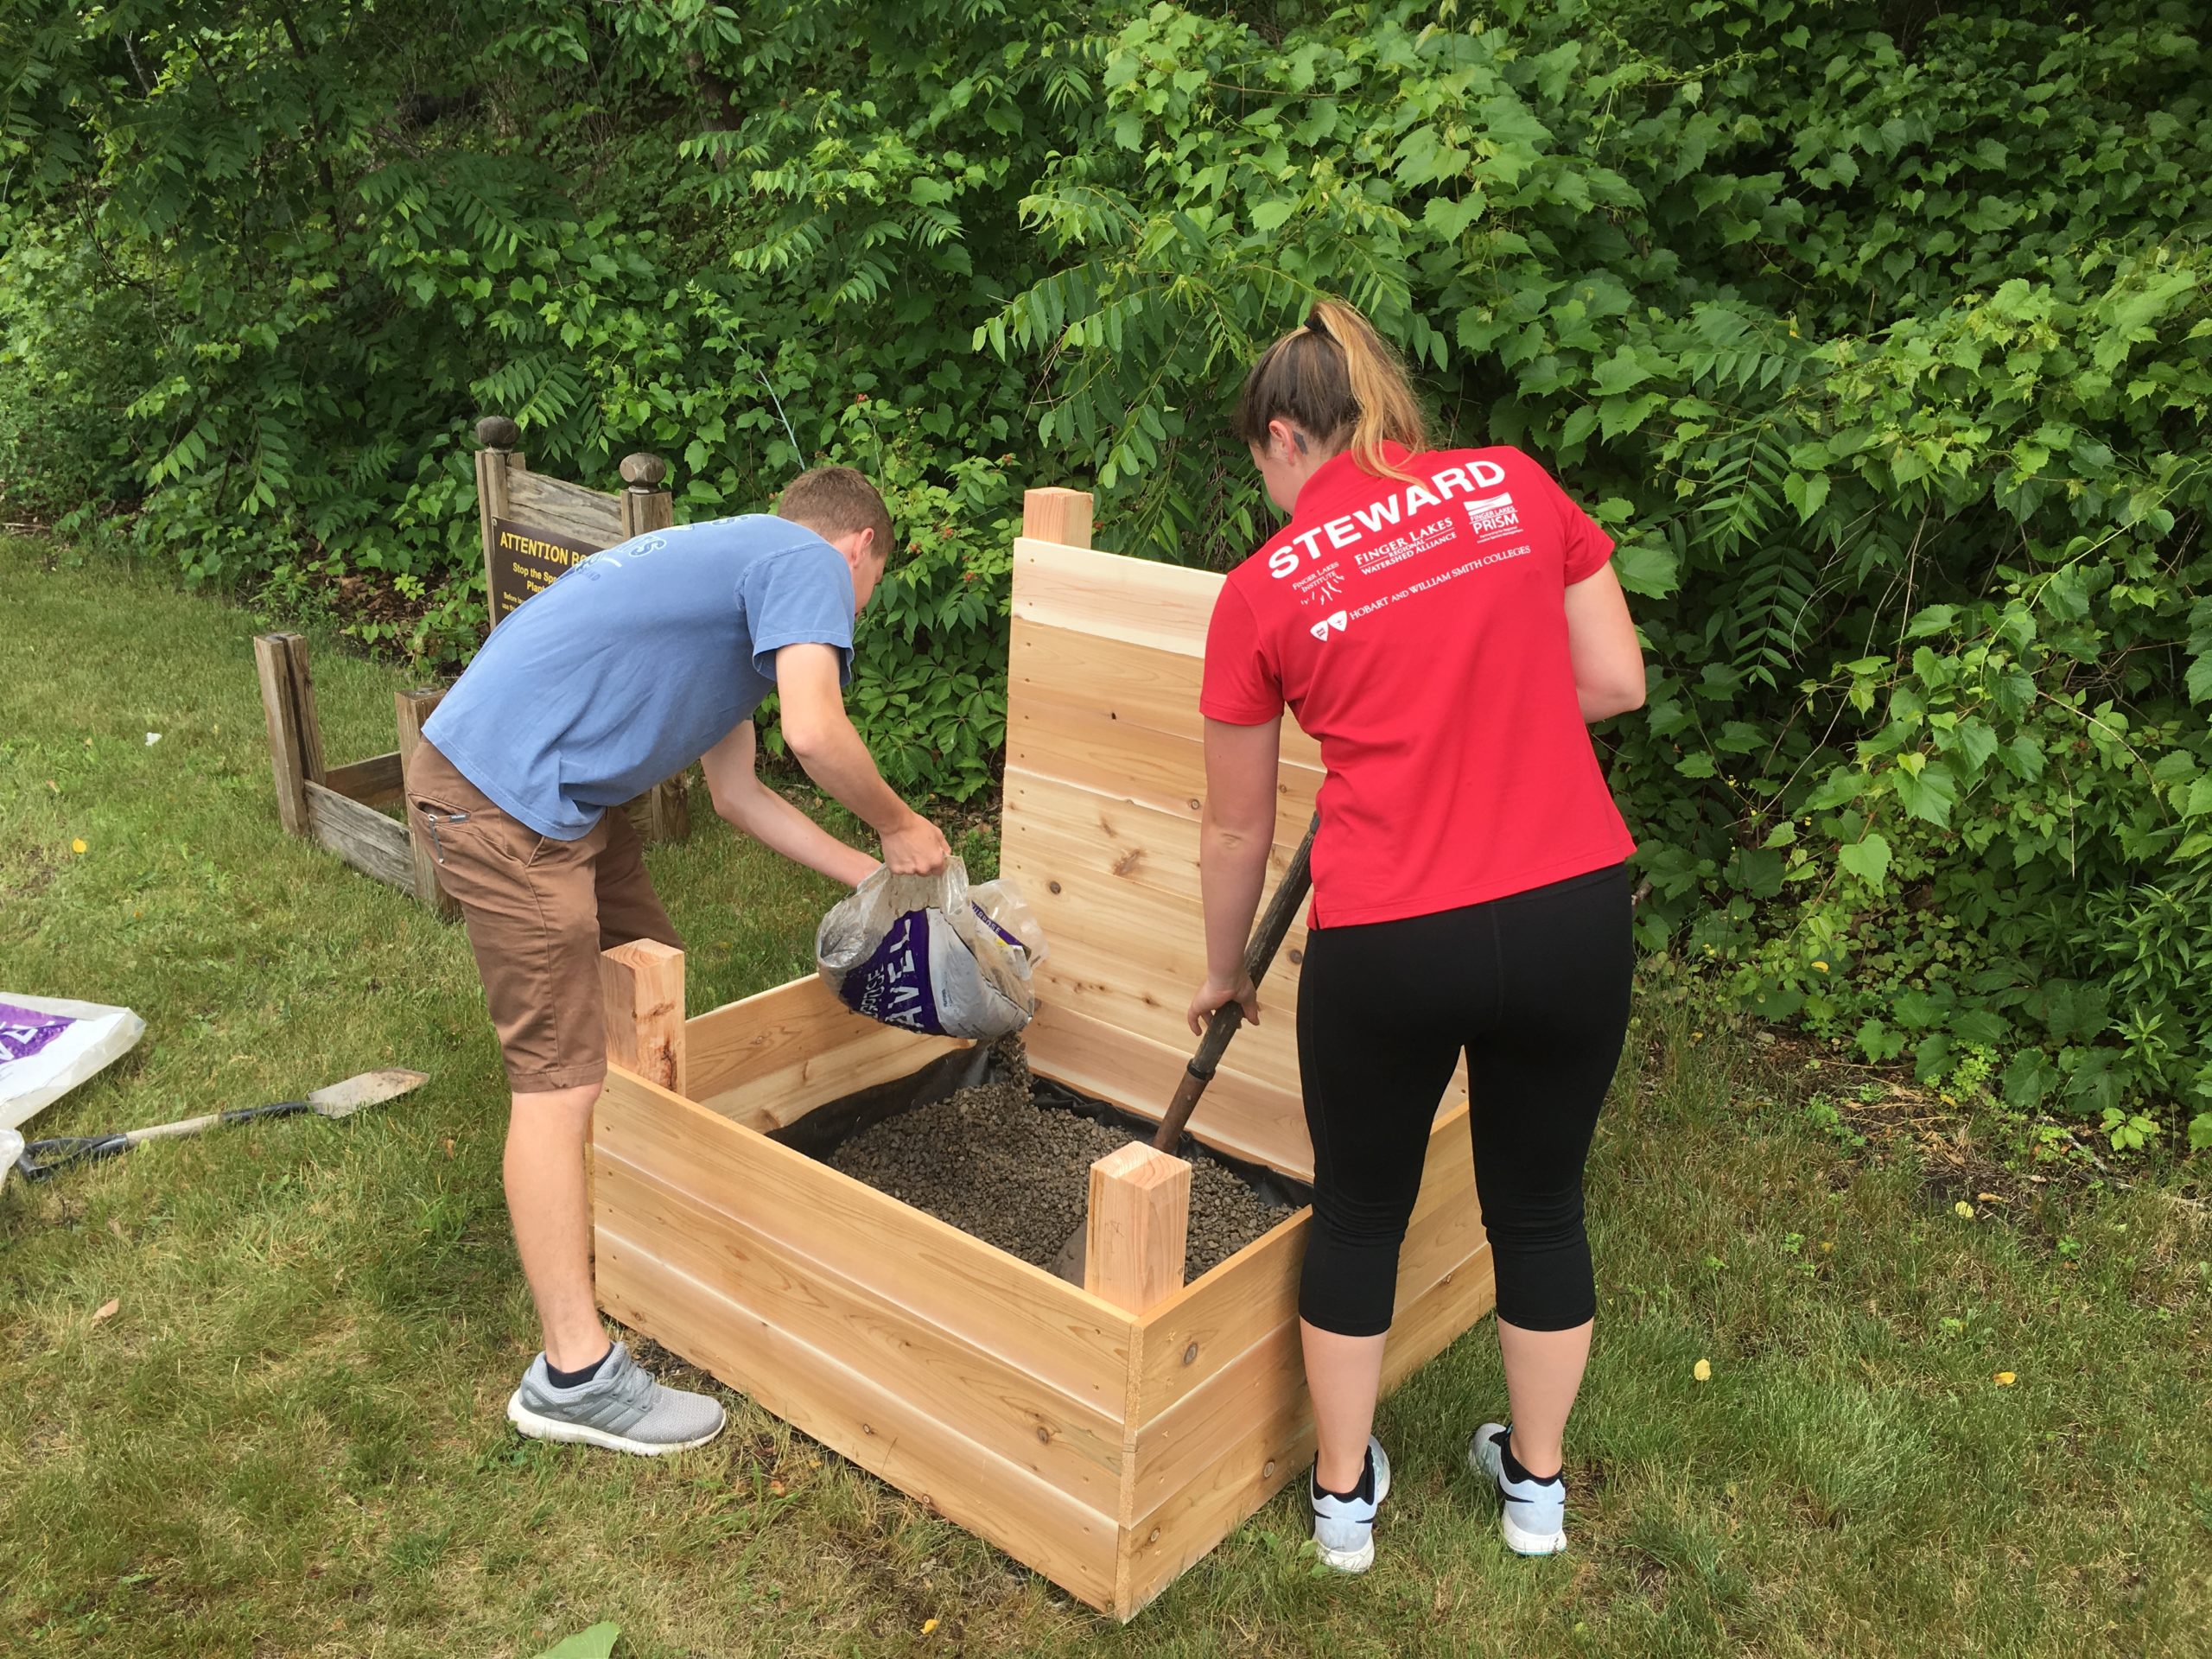
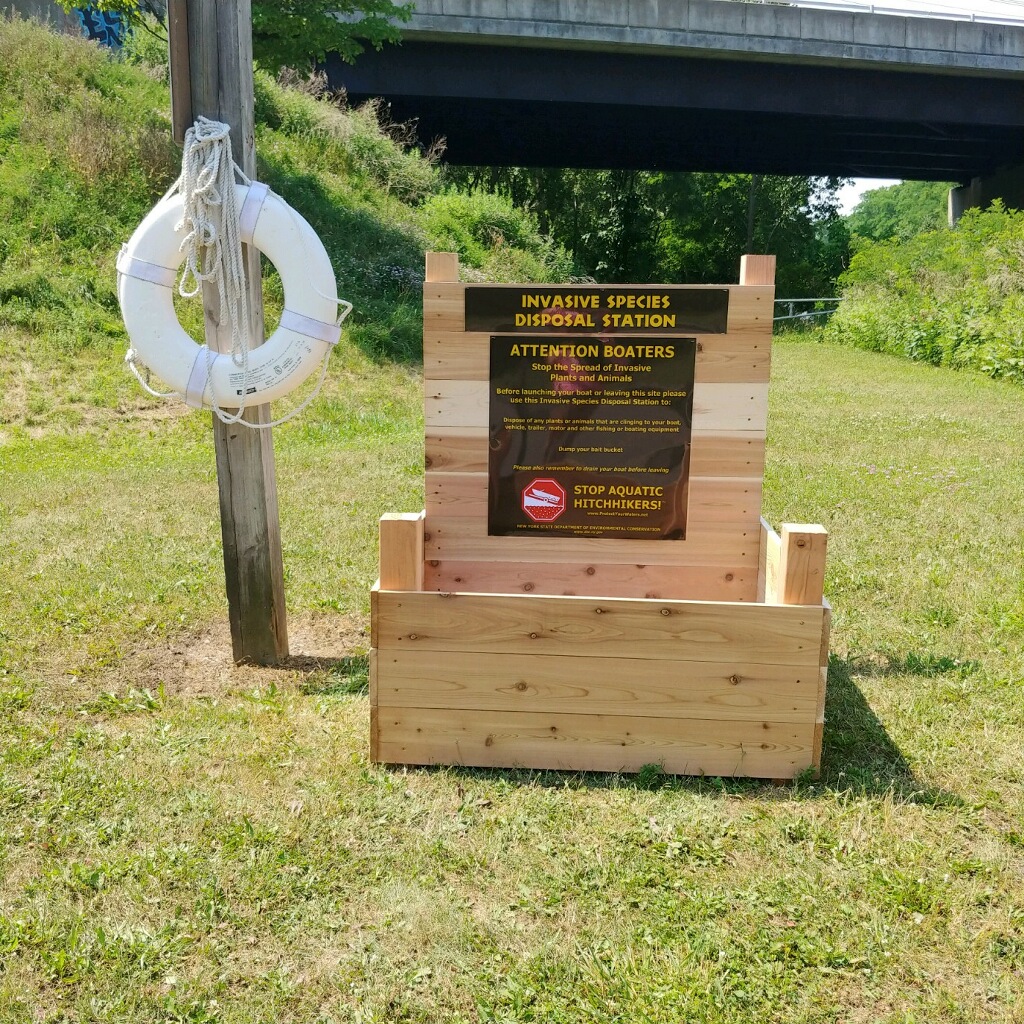
- Install box (Photos 4, 6)
- Find a clear, flat location that provides easy access for boaters using a nearby boat ramp
- Place the completed box, and fill with several bags of gravel to allow for drainage, and to solidify the box in its place
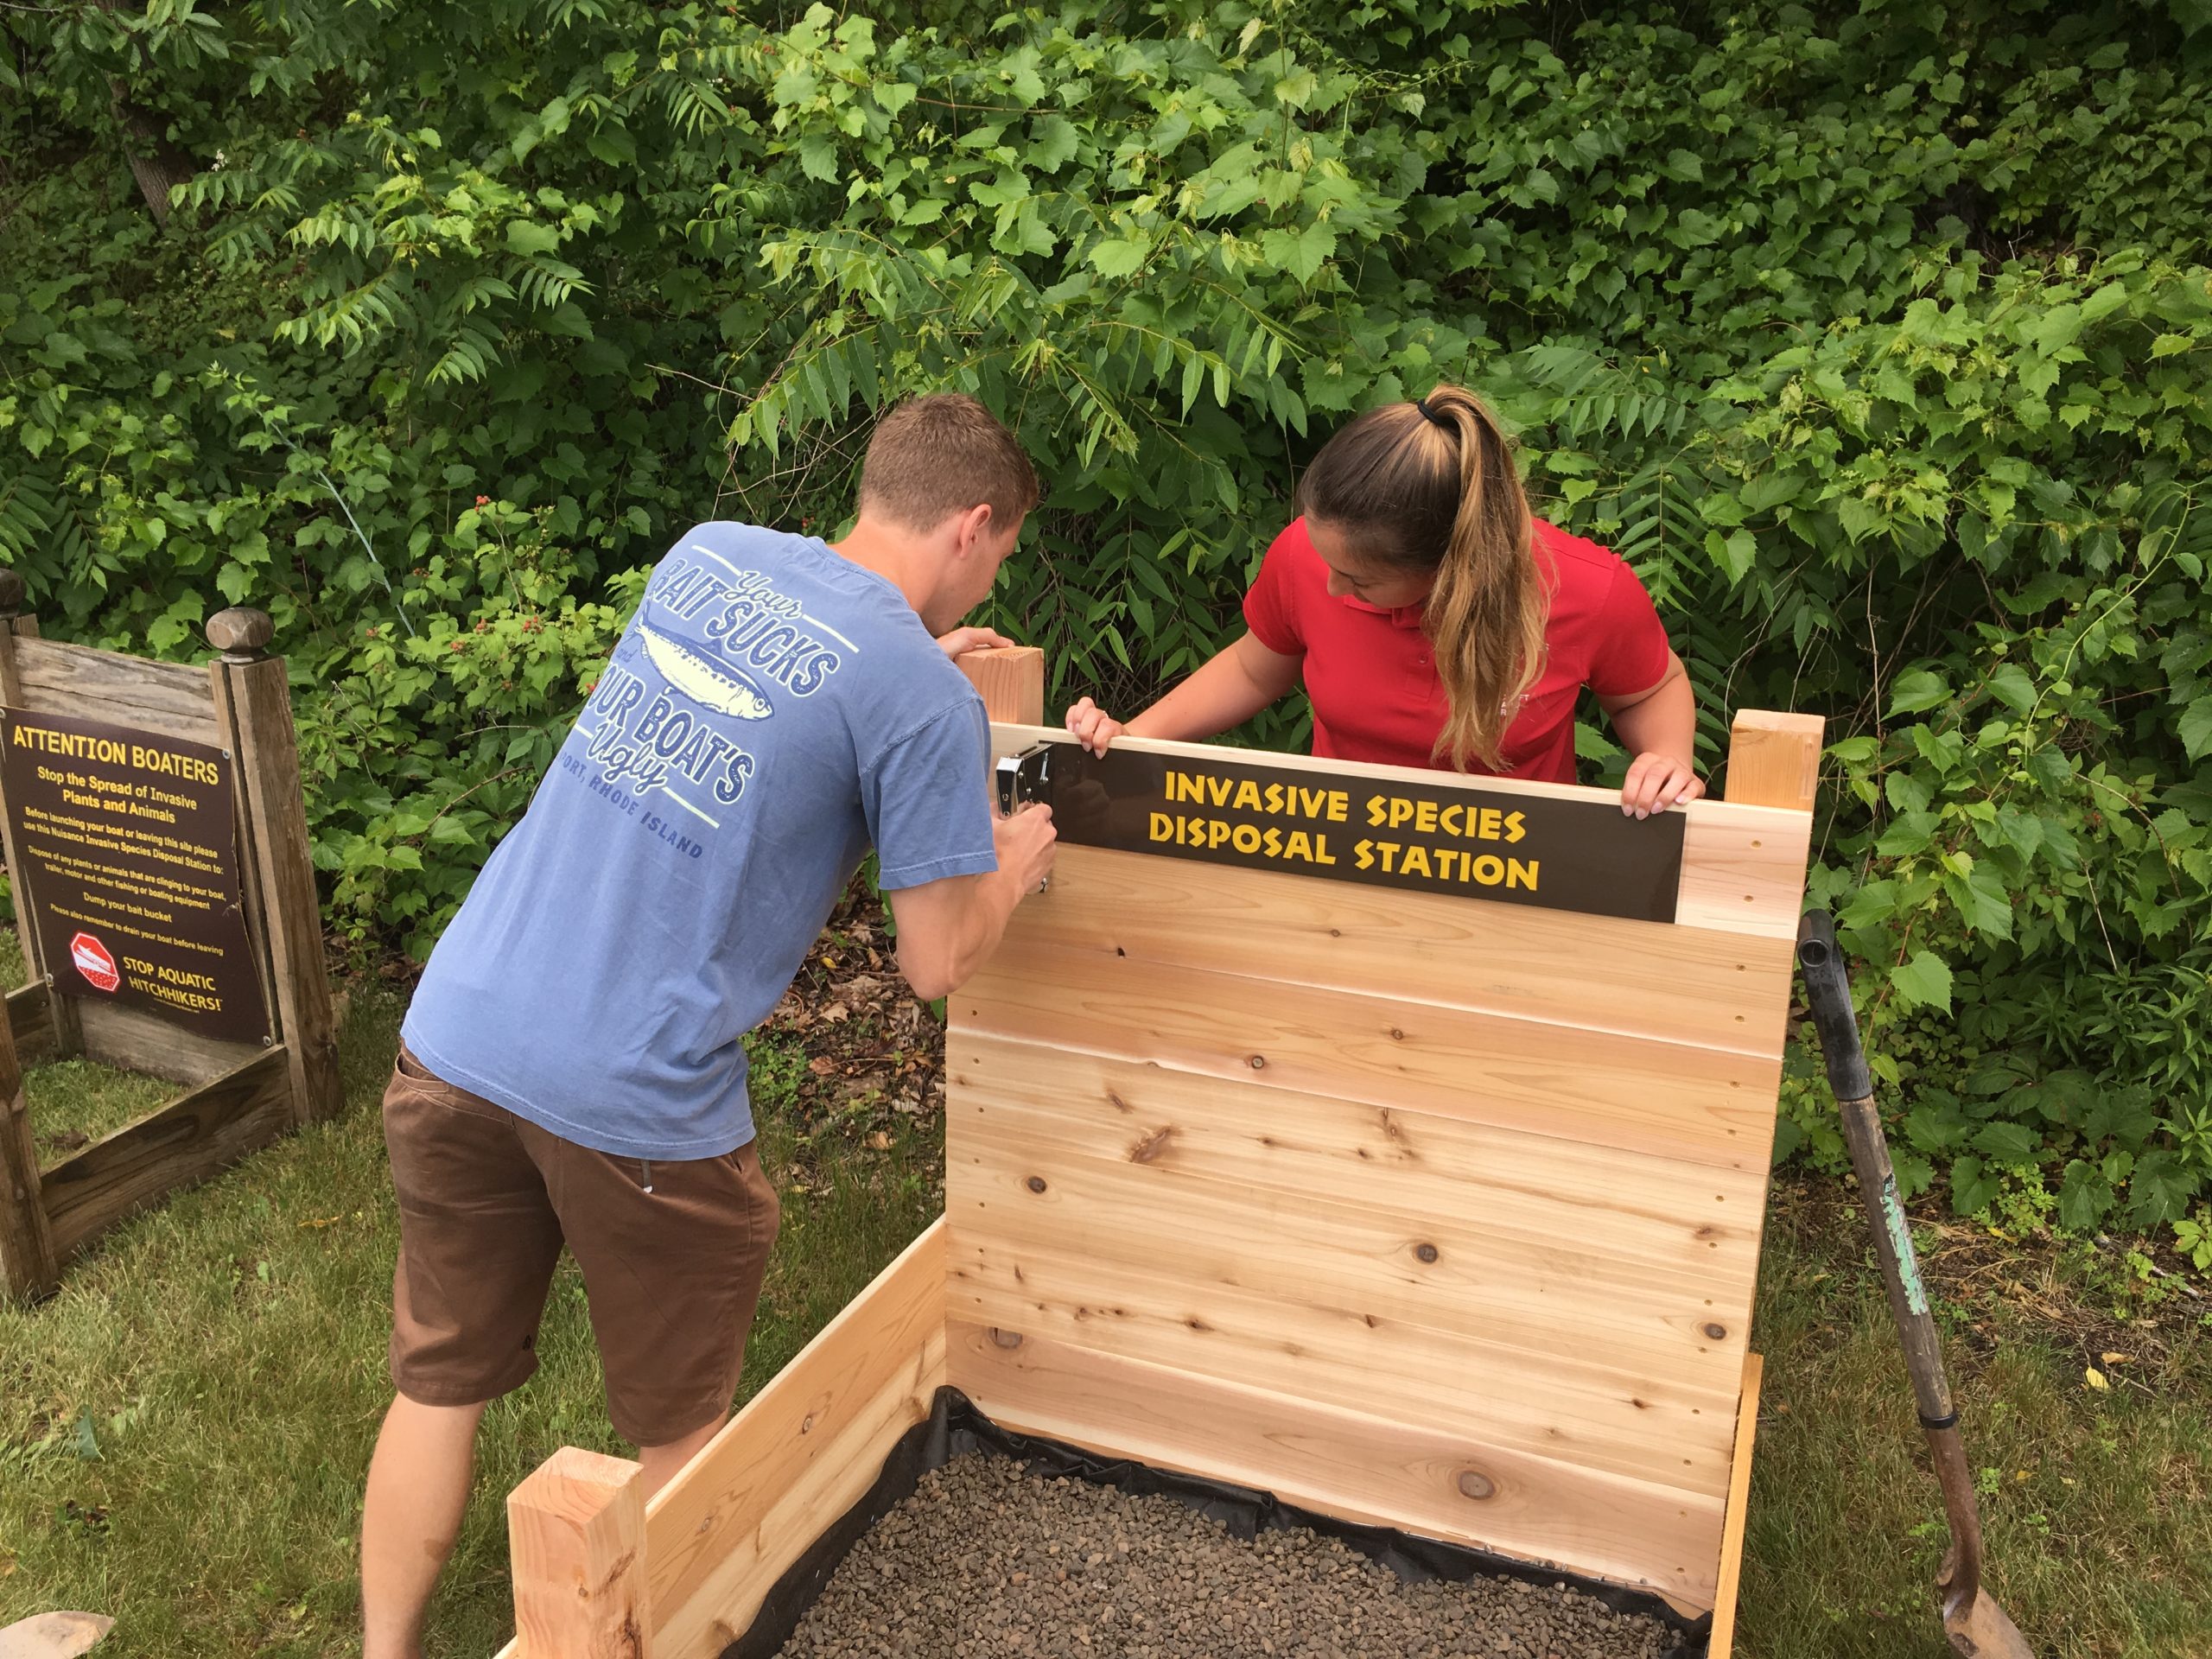
- Install signs (Photo 5)
- Use a clamp or another person to place and hold each sign in the desired location
- Pre drill holes through sign and back panel stringer
- Use short screws (1/2” or 5/8”) to attach each sign to the back panel
- Maintenance
- These boxes should be examined annually
- Check connections between stringers and all 4 posts
- Replace or add screws in areas that seem loose or are worn, pre-drilling when necessary
Signage Details:
- The DEC offers a number of signage options at the link provided at the beginning of this document
- The FLI/FL PRISM has designed and produced an altered AIS sign that is focused on the FL PRISM region, and the AIS threatening the region – this sign acts as the main source of information to onlookers of the various AIS Disposal Stations we have placed in the region
- This sign, and a sign with language more suited to the rest of New York State are available for download at the following link: https://hws.box.com/s/x9gcw4zk7hxr6pc1kxxtkc3mw38y89l3
- The header sign, which identifies the AIS Disposal Station and should be placed above the AIS sign, is available for download at the following link: https://www.dec.ny.gov/docs/fish_marine_pdf/isdsheadersign.pdf
Possible Improvements:
- Paint or Stain the lumber used
- Post tops
 |
 |
||||||
| 1. Assembled front (left) and back (right) panels | 2. Cut out corner sections of fencing to create flaps, and to make space for corner posts | ||||||
|
|
|
||||||
| 3. Fold 8’ x 4’ sheet in half to make a 4’ x 4’ sheet, cut corners for flaps, and staple on top of wire fence | 4. Place in desired position, and fill with gravel | ||||||
|
|
|
||||||
| 5. Pre-drill signs and the back panel in desired location. Fasten signs to back panel with small decking or other weather resistant screws | 6. AIS Disposal Station placed by the FLI at the Fairport/Perinton Erie Canal Boat Launch |

Subscribe
If you enjoyed this article, subscribe to receive more just like it.